Make your own beautiful pearl drop earrings — two ways! Our free photo-tutorial will show you how! Perfect for weddings, gifts, or every day.
Lately I’ve been a little distracted by Pokemon Go — have any of y’all been playing? The other day I went out for what should have been a three, maybe three and a half mile jog… but it ended up being over five miles. I was just wandering around the park hitting the Pokestops and catching Pokemon.
It’s kind of a problem, but at the same time I’ve been getting way more exercise than usual. That can’t be bad, right? I’ll have to lay off soon — I start my new job in a little over a week!
Disclaimer: Please note that some of the links contained in this post are affiliate links. If you make a purchase through one of the links, you will pay the same prices as always, but You Should Craft will receive a small commission that helps to keep the site up and running.
Anyway, I’ve found some time for crafts in between Pokemon catching, so I’m excited to share a jewelry tutorial (well, technically two!) with you today! These pearl drop earrings are easy to make, and look super snazzy. I’m planning on doing a DIY jewelry series that teachers readers how to make several pairs of earrings using the same supplies, so stay tuned!
For my wedding a couple years ago, I made Version 1.0 earrings for my bridesmaids, and I wore Version 2.0 myself. Of course, you don’t have to be getting married to enjoy these classy pearl drop earrings! I still wear mine to parties or weddings when I want to feel fanc. They’d also make great gifts for friends, sisters, or Mother’s Day!
Follow along and in a few minutes you’ll have your own pair (or two!) of pearl drop earrings!
Supplies:
8-9 mm round freshwater pearl beads
Round Crystal Faceted Glass Beads (mine were Bliss Beads purchased from JoAnn Fabrics)
Fish Hook Earring Findings (I used these sterling silver hooks, but you can use any kind/color)
2 inch head pins (in a color that matches your hooks; I used silver)
Round Nose Pliers
Chain Nose Pliers (similar to needle nose pliers)
Wire Cutters
** Click here for a cute set from Amazon that includes all three jewelry tools! **
Pearl Drop Earrings — Version 1.0
If you’re a jewelry making newbie, you may want to start with this pair of earrings. Both v1.0 and v2.0 are easy, but these babies are simple, fast, and a little more forgiving.
Begin by placing a pearl bead and a round crystal bead on to a headpin.
Using your chain nose pliers, hold the head pin a little bit above the beads.
Gently bend the head pin at a 90 degree angle.
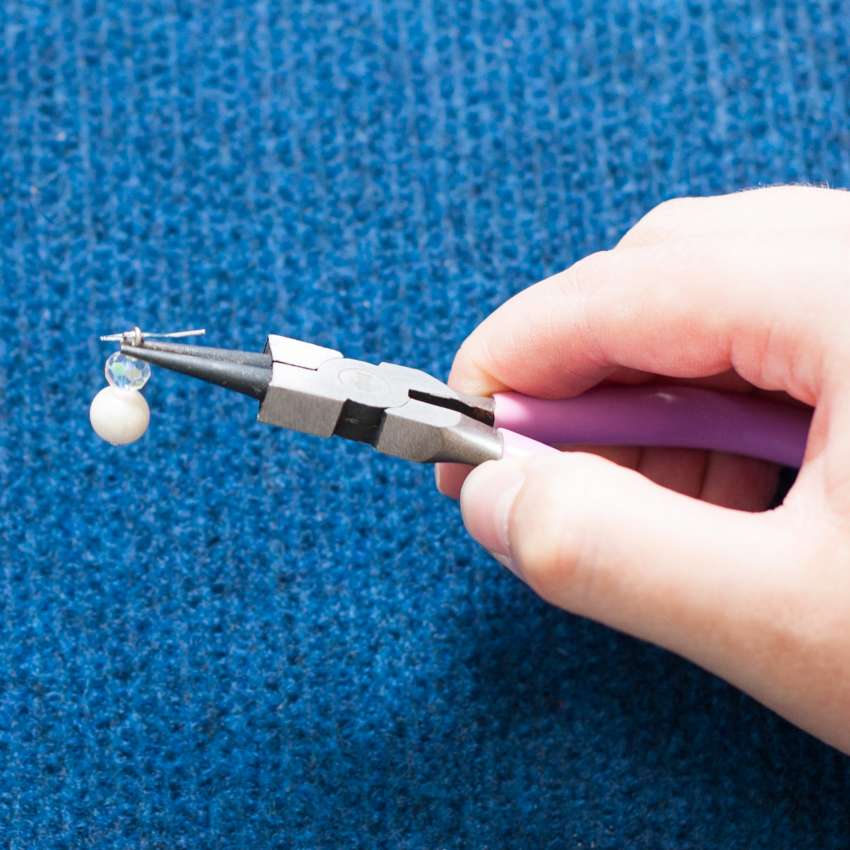
Switch to your round nose pliers and carefully wrap the head pin around the skinniest part of the pliers. If you’re an experienced jewelry maker, you’ll want to trim the head pin before doing this step. If it’s your first time, you may want to wait to trim the head pin until after you’ve made the loop, so you cut the right amount.
In general, your loop will take a little less than half an inch of wire.
Leave the loop open a little bit, so you can connect it to the fish hook earring findings.
Carefully connect your loop the the fish hook earring.
Gently close the head pin loop with your pliers. Earring #1 is finished!
Repeat these steps to make your second pearl drop earring.
That’s it! Pretty great, right?! Pearl Drop Earrings v1.0 are complete!


