If you need the supply list or haven’t had a chance to cut your burlap, head back to the previous page!

Mmkay, let’s get started on our burlap and ribbon wreath!
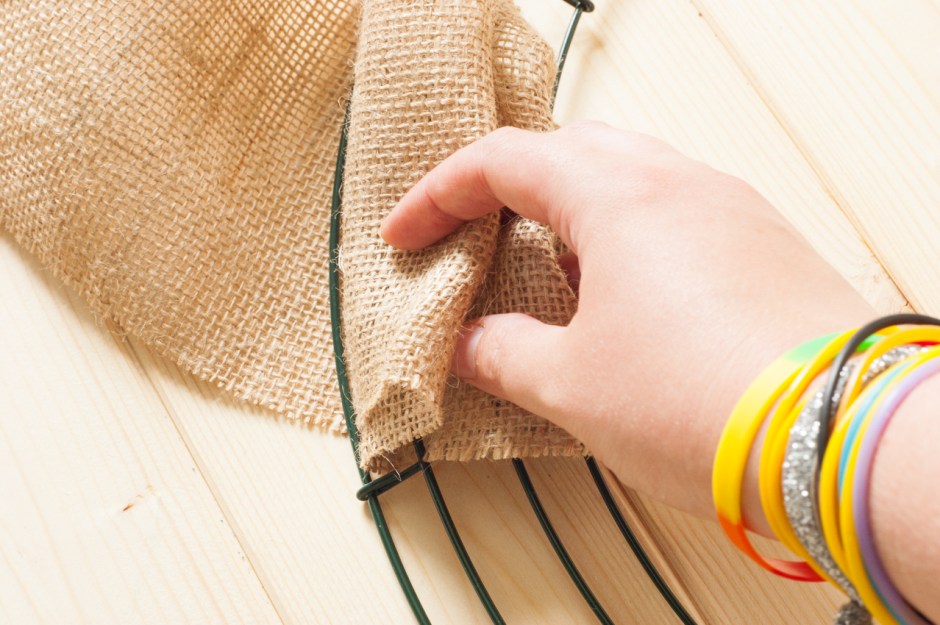
Fold the end of your first piece of burlap ribbon in half, and then in half again. Weave it between the rungs of your 18 inch wire wreath frame.
Fold it over and begin to weave back through one or two rungs. This will become more secure as you build your wreath, because everything will be woven together tightly. You’ll need to repeat this step for each burlap piece you add.
Leaving a 3-4 inch loop, pull the burlap ribbon through the next rung in the wire wreath frame. The loop will seem too wide, but you’ll push the loops together as you add more.
Pull another loop up, from between the next two rungs of the frame.
Wrap the burlap around the outer rung of the wreath frame (leaving a little extra for a loop), and pull the whole strand under the next rung.
Continue to make loops of burlap as you did before, weaving the burlap between the rungs of the frame. After 5-6 loops, add your first color of wire ribbon by tying a tight knot around a rung.
Once the first ribbon is connected, make a loop with it using the same technique you’ve been using for the burlap. I found it easier to unroll all of the ribbon, so it was no longer on the spool, but it’s not necessary if you like to keep your crafts neat and tidy.
After the first loop from the first ribbon, add a couple more burlap loops, then tie on the second color of ribbon and make a loop. You’ll continue in this fashion, rotating between making loops with burlap and with ribbon, until you finish the wreath.
As you work, push the loops together to make the wreath more full (as well as more secure). If you cut your own burlap, you may begin to see some loose strands. I waited to trim until the end, but you could also trim as you go.
Almost done! This burlap and ribbon wreath works up quickly, though cutting your own burlap will add some time. Turn on a movie or a couple episodes on Netflix and you’ll be done with everything in an hour and a half, give or take.
Here’s the back. Not exactly beautiful, but it will be laying against a wall or a door, so no one will see your mess. 😉
When I finished, I used some of my extra sparkly ribbon to tie a bow around my wreath. Since it’s wire ribbon, you can force it to do basically whatever you want, so I tied the bow the same way I tie my shoes and then tried to clean it up a little. I’m sure there’s a more professional way to tie a ribbon bow, but I didn’t feel like Googling it. Perhaps next time!
I hung my burlap and ribbon wreath on my new Colorado front door. Now to finish decorating the inside of my apartment…


